
Here are a couple of tricks that I got after digging through videos and forums.
1. Upgrading your calculator to an fx- 570MS
All Casio two-line scientific calculators appear to use the same firmware and circuit board. A combination of several soldered contacts imply which feature of the firmware to enable by default. A pencil can be used to permanently apply this change but it has been prevented with a hard black obstacle injected onto that section of the board.
But we can rather do this by exploiting an overflow bug which last till the next reboot.
-Enter standard deviation mode by pressing [mode] [2]
-Press [0], then press [M+] til the words "Data Full" appear on the screen.
-Press [M+] [2] [Up]
-Press [1] [3] repeatedly til no more can be entered.
-Press [=] you will see the words "Data Full".
-Press [=] [0] [1] [AC]
With the laws followed properly, the available modes should be expanded to,
- COMP (general computation)
- CMPLX (complex numbers)
- SD (standard deviation)
- REG (regressions)
- BASE (base conversions)
- EQN (solving equations)
- MAT (matrices)
- VCT (vectors)
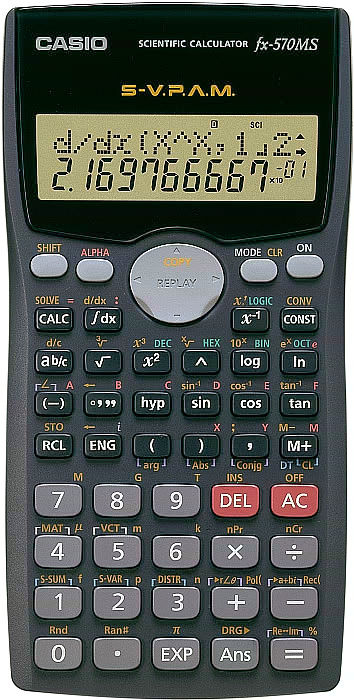
Of particular note is an an image of the fx-570MS, which will become very useful for you when you need to find a key, because although the key layout will be the same as on your calculator, the labels will not be.
Diagnostic test
This is a built in capability in the firmware, presumably to allow easy, initial in-factory testing of the screen and keypad. At any time during the test, pressing
[ON] will reboot the calculator, ending the test.- While holding
[SHIFT]and[7]down, press[ON]. The display will turn on all of its elements. - Press
[SHIFT]. The display will clear completely. - Press
[SHIFT]. The display will turn on half of its elements in a pattern. - Press
[SHIFT]. The display will turn on the other half of its elements. - Press
[SHIFT]. On the first line of the display, you will see "25" on the left, and "4" on the right. On the second line of the display, you will see all zeroes, including in the exponent. - Press
[SHIFT]nine times. The display will cycle its second line through all ones, then all twos, and so on, until the second line consists of all nines. - Press
[SHIFT]. The display will clear and the second line will be set to "0". This commences the keypad testing routine. - Press the keys of the keypad in the order,
[SHIFT] [ALPHA] [MODE] [LEFT] [UP] [RIGHT] [x-1] [nCr] [Pol(] [x3] [DOWN]
then the rest of the keys, as you would read them left to right, until[=]. On the first line of the display, you will see25on the left, andOKon the right. On the second line of the display, you will see4. - Press
[ON]to reboot the calculator and exit the test.

No comments:
Post a Comment